
Proxmox VE is an open-source server platform for enterprise virtualization. As a Debian-based Linux distribution, Proxmox uses a modified Ubuntu kernel to run multiple virtual machines and containers on a single server. You can deploy and manage virtualized environments through a web console or a command line, ensuring simple and fast accessibility.
Prerequisites
- A physical or dedicated server.
- 64bit CPU.
- At least 1GB of RAM (and additional RAM needed for guests).
- A USB stick with at least 1GB.
- Install Proxmox Virtual Environment
Follow the steps below to install Proxmox VE on a physical or dedicated server.
Step 1: Download Proxmox ISO Image
The first step is to download the Proxmox VE ISO image.
-
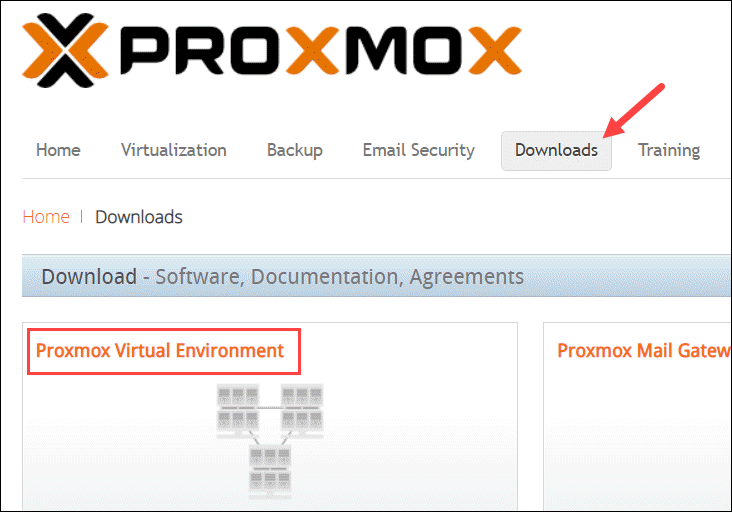
Navigate to the official Proxmox Downloads page and select Proxmox Virtual Environment.
-
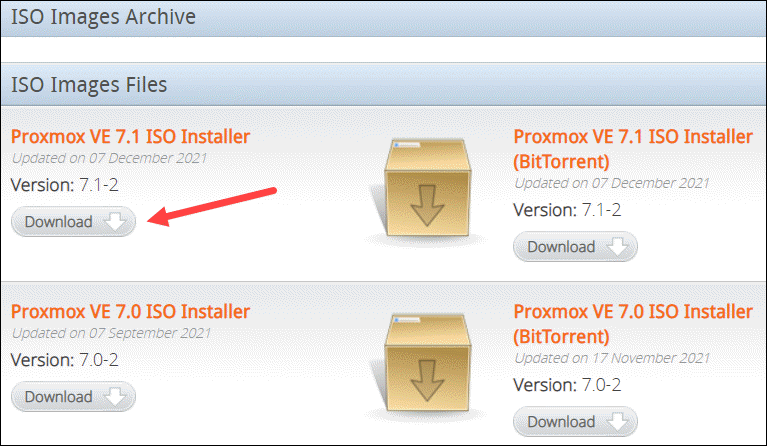
This takes you to the Proxmox Virtual Environment Archive, which stores ISO images and official documentation. Select ISO Images to continue.

- At the time of writing, the latest version of the Proxmox VE ISO Installer is 7.1. If a newer version is available, it is listed at the top. Click Download and save the file.
Step 2: Prepare Installation Medium
Copy the Proxmox ISO image on a CD/DVD or a USB flash drive. Although both options are possible, it is assumed that most systems won’t have an optical drive.
Plug in the USB drive and copy the ISO image to the USB stick using the command line or a USB formatting utility (such as Etcher or Rufus).
Step 3: Launch the Proxmox Installer
-
Move to the server (machine) where you want to install Proxmox and plug in the USB device.
-
While the server is booting up, access the boot menu by pressing the required keyboard key(s). Most commonly, they are either Esc, F2, F10, F11, or F12.
-
Select the installation medium with the Proxmox ISO image and boot from it.
-
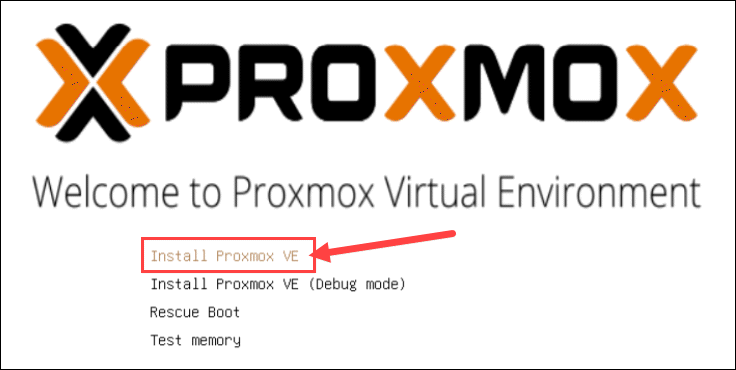
Next, the Proxmox VE menu appears. Select Install Proxmox VE to start the standard installation.
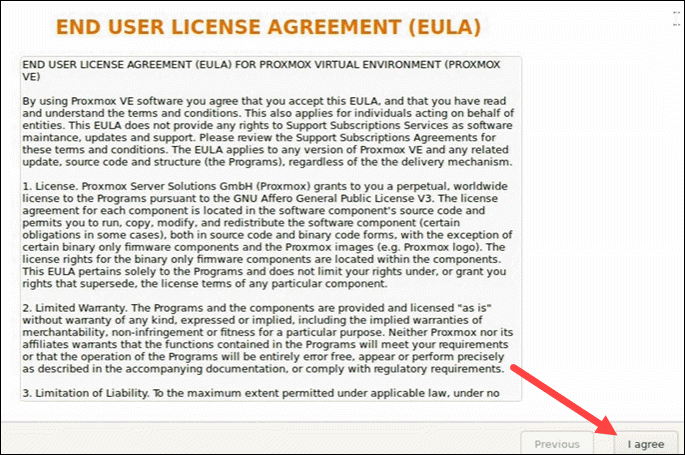
- Read and accept the EULA to continue.
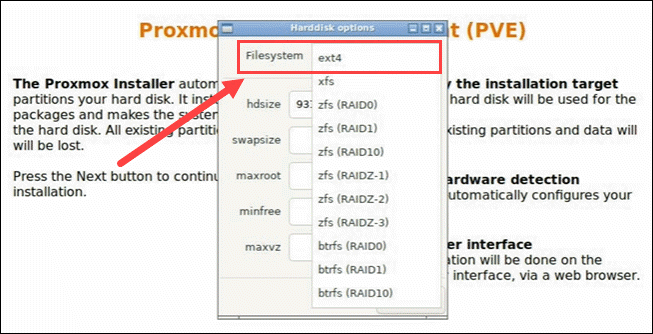
- Choose the target hard disk where you want to install Proxmox. Click Options to specify additional parameters, such as the filesystem. By default, it is set to ext4.
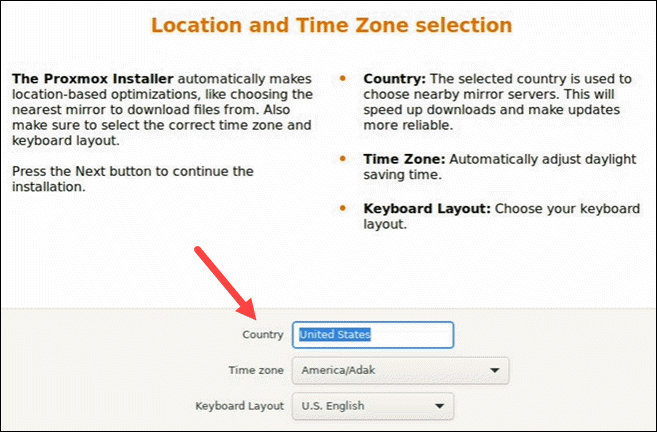
- Then, set the location, time zone, and keyboard layout. The installer autodetects most of these configurations.
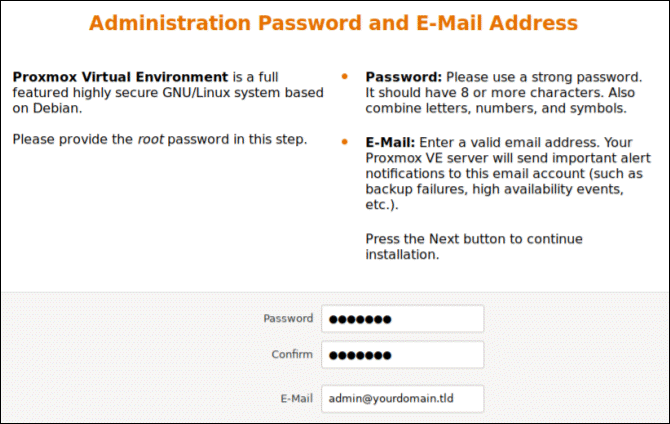
- Create a strong password for your admin credentials, retype the password to confirm, and type in an email address for system administrator notifications.
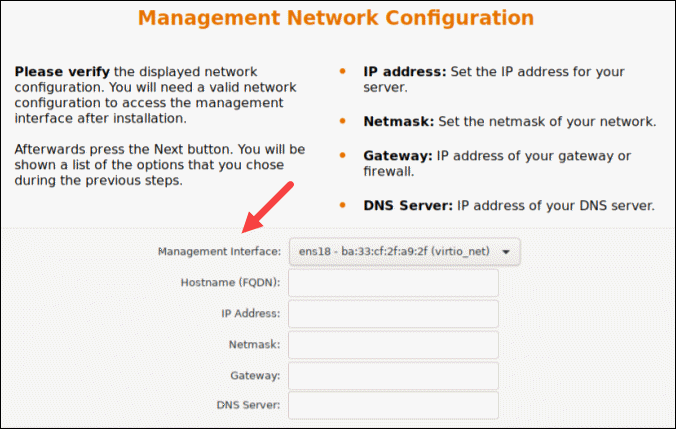
- The final step in installing Proxmox is setting up the network configuration. Select the management interface, a hostname for the server, an available IP address, the default gateway, and a DNS server. During the installation process, use either an IPv4 or IPv6 address. To use both, modify the configuration after installing.
-
The installer summarizes the selected options. After confirming everything is in order, press Install.
-
remove the USB drive and reboot the system after installation.
Step 4: Run Proxmox
-
Once the system reboots, the Proxmox GRUB menu loads. Select Proxmox Virtual Environment GNU/Linux and press Enter.
-
Next, the Proxmox VE welcome message appears. It includes an IP address that loads Proxmox. Navigate to that IP address in a web browser of your choice.

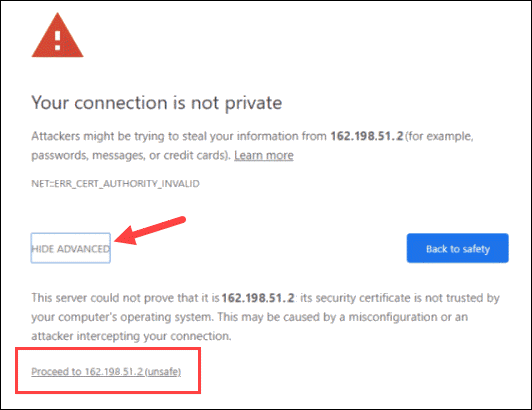
- After navigating to the required IP address, you may see a warning message that the page is unsafe because Proxmox VE uses self-signed SSL certificates. Click the IP link to proceed to the Proxmox web management interface.
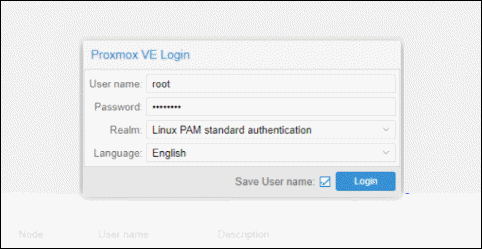
- To access the interface, log in as root and provide the password set when installing Proxmox.
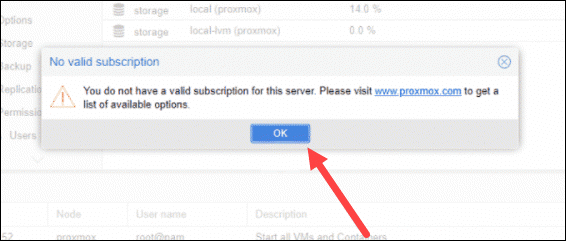
- A dialogue box pops up saying there is no valid subscription for the server. Proxmox offers an optional add-on service to which you can subscribe. To ignore the message, click OK.
Congratulations You Have Successfully installed Proxmox VE
